

Table of Contents
- What Is a No-Monthly-Fee Security System?
- Pros and Cons of Self-Monitored Home Security
- Best Self-Monitored Home Security Systems
- DIY Smart Home Security Setup: Step-by-Step
- Local Storage Security Cameras vs. Cloud Recording
- Smart Home Integration and Automation
- Privacy, Legal, and Insurance Considerations
- Maintenance and Troubleshooting Your System
Last Updated: August 18, 2026
What Is a No-Monthly-Fee Security System?
A no-monthly-fee security system is a self-monitored home security setup that requires no recurring subscription costs after the initial hardware purchase. You own and manage the entire system yourself, handling monitoring, alerts, and response without delegating to a professional monitoring center. This approach combines locally-stored video footage, wireless entry sensors, motion detection, and real-time alerts delivered directly to your smartphone, all without paying monthly monitoring fees.
The core difference from traditional monitored systems is control. You're responsible for responding to alerts, reviewing footage, and managing the network infrastructure. Many homeowners choose this path to avoid the $20-50 monthly fees that professional monitoring services charge. At The Daily Drop by Ed Rivera, we understand that homeowners want affordable smart home solutions without sacrificing capability. A well-configured DIY system can deliver the same detection capabilities as professionally-monitored alternatives while keeping total cost of ownership significantly lower.
Pros and Cons of Self-Monitored Home Security
Advantages:
The most obvious benefit is cost elimination. No monthly fees means your only expenses are upfront hardware and occasional replacements. A complete system with hub, cameras, entry sensors, and local storage might cost $300-800 one time, versus $400-600 annually with professional monitoring. Over five years, that's a $2,000-3,000 difference.
Control is the second major advantage. You decide what triggers alerts, how notifications are formatted, and what footage is retained. Privacy-focused users find self-monitored systems compelling because video footage stays on local storage or a private network, never uploaded to company servers. The system is also flexible, you can add cameras, replace sensors, or upgrade storage without contacting support or renegotiating contracts.
Disadvantages:
You become the monitoring service. Alerts come to your phone, but you're responsible for responding. If you're traveling without cell service or sleeping deeply, you might miss something critical. A professional monitoring center never sleeps.
Technical setup requires real knowledge. Configuring local storage, network security, firmware updates, and sensor pairing demands more than plugging in hardware. If something breaks, you're troubleshooting without a support hotline.
Insurance implications are worth considering. Many homeowners insurance policies offer discounts for professionally monitored systems. Self-monitored systems may not qualify for those discounts, offsetting some of the monthly fee savings. Check your policy before assuming you'll save money overall.
False alarms become your problem. Professional monitoring services verify alerts before dispatching emergency services. You're manually verifying motion detection alerts on your phone, which means more false positives reaching your attention.
Best Self-Monitored Home Security Systems
Building an effective self-monitored system requires selecting hardware that integrates cleanly and supports local storage without forcing you into cloud dependencies.
Hub-Based Systems:
A hub acts as the central control point for your sensors and cameras. It handles local processing, stores encryption keys, and coordinates communication between devices. Popular hub options include systems built around protocols like Zigbee or Z-Wave, which offer wide hardware compatibility. These hubs typically cost $100-200 and support 20-50+ connected devices depending on the model.
The advantage of a hub-based approach is interoperability. Different manufacturers' sensors can communicate through the same hub if they use compatible protocols. This means you're not locked into buying all components from one brand.
Local Storage Options:
Network-attached storage (NAS) devices are purpose-built for storing video footage locally. A basic NAS with two drive bays costs $200-400 and can store weeks or months of footage depending on camera resolution and recording frequency. Alternatively, some systems support direct USB storage or SD cards on the hub itself, which works for smaller installations but limits capacity.
Camera Selection:
Look for cameras with local recording capability and support for standard protocols like RTSP (Real Time Streaming Protocol) or ONVIF (Open Network Video Interface Forum). These standards ensure your cameras can work with multiple storage and management platforms rather than being locked into proprietary software.
Wireless cameras simplify installation but require strong mesh network setup. Wired cameras offer consistent power and bandwidth. Many effective systems use a hybrid approach. Night vision capability is standard on most security cameras.
Entry and Motion Sensors:
Wireless door and window sensors cost $15-30 each and typically run on AA batteries lasting 6-12 months. Motion detectors with pet immunity range from $25-60. Entry sensors on all exterior doors and ground-floor windows provide comprehensive coverage. Motion detectors work best in hallways and main living areas.
DIY Smart Home Security Setup: Step-by-Step
Setting up a complete self-monitored system takes 4-8 hours depending on complexity and your comfort level with networking.
Step 1: Choose Your Hub and Sensors
Start by selecting a hub that supports the sensors and cameras you plan to use. Research which protocols your chosen hub supports, Zigbee, Z-Wave, Wi-Fi, or proprietary options. Make a list of specific sensor models you want to integrate and verify compatibility before purchasing.
Choose your entry sensors for all exterior doors and ground-floor windows. Select motion detectors for interior spaces where motion indicates an intrusion risk. Pet-immune motion detectors prevent false alarms from household animals.
Step 2: Install Cameras and Entry Points
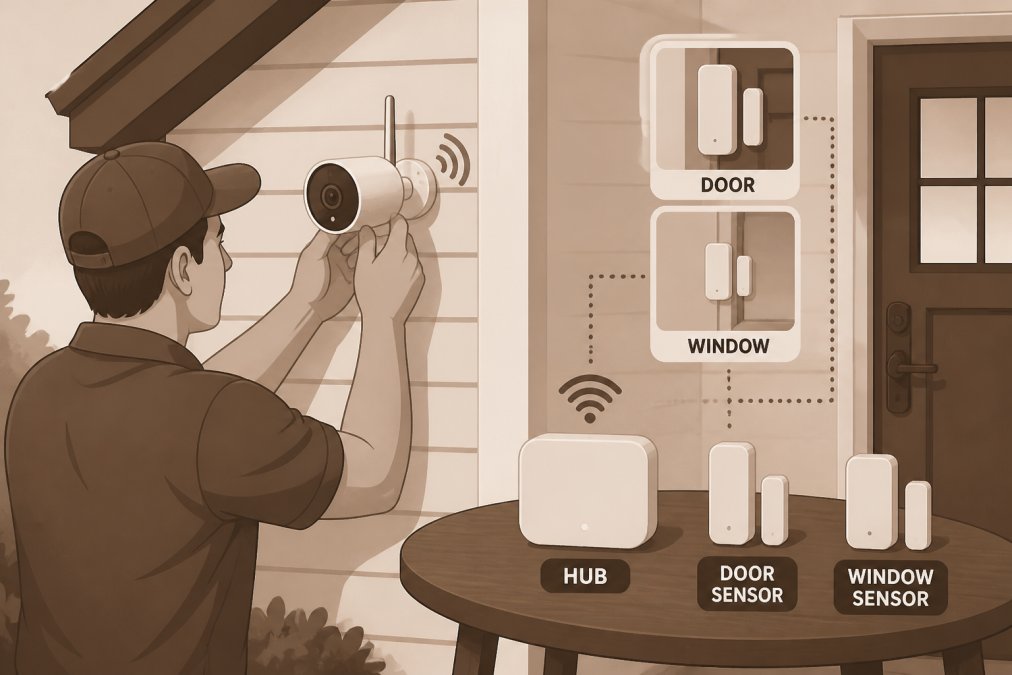
Position cameras to cover entry points and high-value areas. Exterior cameras should monitor doors, windows, and driveways. Mount cameras at a 45-degree angle pointing downward to capture facial features. Height of 8-10 feet is typical for exterior cameras.
Install entry sensors on the frame of doors and windows so the magnet and sensor are properly aligned when closed. Configure each device in your hub's app as you install it, including naming the device, assigning it to a zone, and setting sensitivity levels.
Step 3: Configure Local Storage and Network Security
Connect your NAS device to your home network via ethernet cable. Configure it with RAID 1 or RAID 5 if using multiple drives for redundancy. Install video management software on the NAS that supports ONVIF or RTSP cameras. Configure the software to record continuously or use event-based recording to save storage space.
Set retention policies for how long footage is kept before being overwritten. Thirty days is typical for continuous recording.
Network security is critical. Change all default passwords on your hub, NAS, and cameras to strong, unique passwords. Enable two-factor authentication on any management interface you access remotely. Disable UPnP on your router and manually configure port forwarding only for ports you actually use. Update firmware on all devices regularly.
Local Storage Security Cameras vs. Cloud Recording
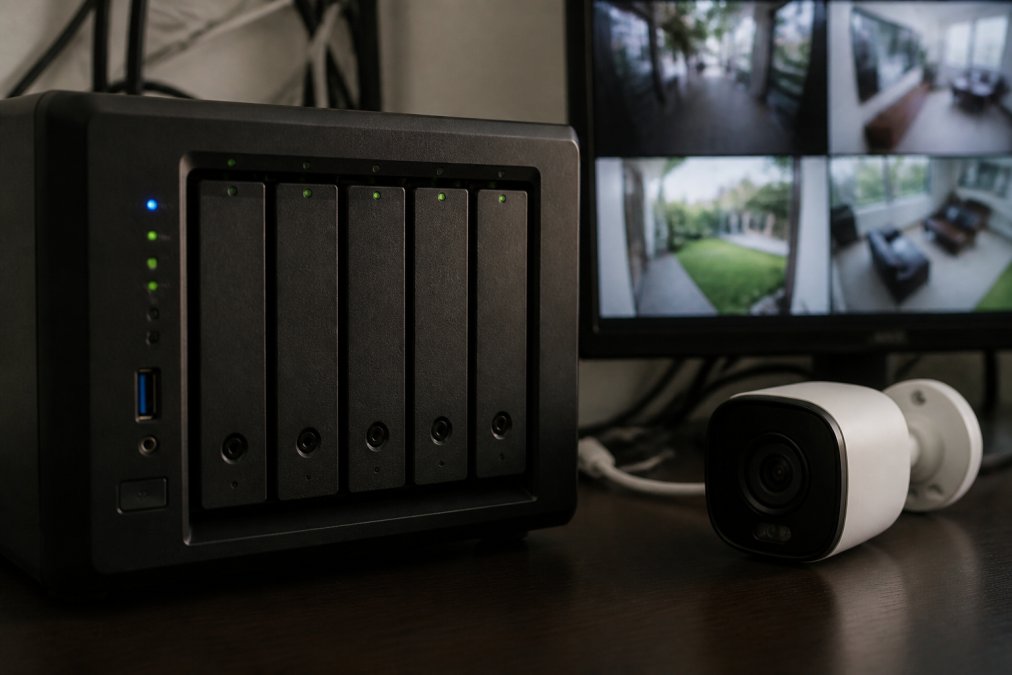
Local storage means footage never leaves your home network. Video files stay on your NAS or local hard drive, accessible only through your home network or a secured remote connection. This approach provides maximum privacy, no company has copies of your footage and no cloud service can be hacked to expose your recordings.
The tradeoff is capacity and accessibility. A NAS with two 8TB drives stores roughly 60-90 days of continuous 1080p video from a single camera. Accessing footage from outside your home requires setting up secure remote access, which adds technical complexity.
Cloud recording uploads footage to a company's servers in real time, providing unlimited storage and accessibility from anywhere. However, your video is stored on third-party infrastructure, subject to that company's data handling policies and potential breaches. You're also dependent on that service remaining in business.
For self-monitored systems focused on cost elimination, local storage aligns better with your goals. You own the hardware, you control the data, and you pay nothing ongoing.
Smart Home Integration and Automation
A self-monitored security system integrates with broader smart home automation to create workflows that respond automatically to security events. When motion is detected at your front door after dark, your system can trigger smart lights to turn on. When a door sensor detects unauthorized entry, it can lock all smart locks and send you an immediate notification.
These integrations require compatible devices and a hub or automation platform that supports them. Two-way audio on cameras lets you communicate through the speaker and microphone. Real-time alerts mean you're notified the moment motion is detected or a door opens, with video thumbnails letting you assess the situation immediately.
Privacy, Legal, and Insurance Considerations
Recording on your own property is generally legal, but recording in areas where people have reasonable expectations of privacy, bathrooms, bedrooms, raises legal concerns. Position cameras to monitor entry points and common areas, not private spaces.
If you record audio, state recording laws vary. Some states require all parties in a conversation to consent to recording. Research your state's recording laws before enabling audio features.
Contact your homeowners insurance provider before finalizing your system. Some policies offer discounts for professionally monitored systems but not for self-monitored alternatives. Understanding your policy prevents unexpected coverage gaps if you file a claim.
If your system detects a break-in and you call emergency services, be prepared to explain that you're not using professional monitoring. Accurate configuration matters, false alarms undermine credibility when a real emergency occurs.
Document your data retention and deletion policies. How long do you keep footage? Who has access to it? What's your process for deleting old recordings?
Maintenance and Troubleshooting Your System
Battery-powered sensors need replacement every 6-12 months depending on activity levels. Create a calendar reminder to check battery status quarterly.
Firmware updates are released regularly by manufacturers. Check your hub, cameras, and NAS for updates monthly. Security patches are critical, they fix vulnerabilities that could allow unauthorized access.
Motion detector false alarms often result from misalignment or sensitivity misconfiguration. Adjust the sensitivity setting if you experience frequent false triggers or missed detections.
Wireless connectivity issues are common with mesh networks. If a camera or sensor loses connection frequently, move your Wi-Fi router closer or add a mesh network extender.
When troubleshooting connectivity issues, restart your hub first, this resolves most temporary glitches. If problems persist, check manufacturer support documentation or community forums.
Building a self-monitored smart home security system requires upfront investment in hardware and technical setup time, but it eliminates the monthly fees that make professional monitoring expensive over time. The Daily Drop by Ed Rivera offers access to affordable security components, smart home devices, and networking equipment that make building a complete system cost-effective. Start with a quality hub, add sensors and cameras strategically, configure local storage for privacy, and maintain your system regularly to keep it reliable. When you own your security infrastructure and manage it yourself, you control both the capability and the cost.
Frequently Asked Questions
Can you have a home security system without a monthly subscription?
Yes. Self-monitored systems with local storage eliminate recurring fees entirely. You pay upfront for cameras, sensors, and a hub, then manage alerts yourself through a mobile app or receive push notifications. Local storage options like NAS drives or SD cards store footage without cloud subscriptions. Some systems offer optional cloud backup, but it remains optional rather than mandatory.
What is the best self-monitored home security system for DIY installation?
The best choice depends on your network setup and budget. Hub-based systems like Wyze, Eufy, and Reolink offer wireless connectivity, motion detection, and night vision without requiring professional installation. Look for systems with local storage support, two-way audio, and mesh network capability. Verify that your chosen system integrates with your existing smart home ecosystem and supports real-time alerts and event-based recording.
How do I store security camera footage without a cloud subscription?
Use local storage options: SD cards in cameras, network-attached storage (NAS) devices, or external hard drives connected to your hub. Many cameras support continuous recording or event-based recording directly to local drives. Ensure your storage device has sufficient capacity (typically 500GB to 4TB depending on camera count and retention needs) and set up automated deletion policies to manage space over time.
Is self-monitoring as effective as professional monitoring?
Self-monitoring places responsibility on you to respond to alerts, which works well if you're home or can access your system remotely. Professional monitoring dispatches emergency services automatically, offering faster response in emergencies. For budget-conscious homeowners, self-monitoring with real-time push notifications and two-way audio covers most deterrent and verification needs. Consider your risk tolerance and availability before choosing.
This article was written using GrandRanker