

Table of Contents
- What a Check Engine Light Actually Means
- Common Check Engine Light Codes and What They Signal
- Step-by-Step: How to Diagnose the Problem
- Quick Fixes You Can Try Right Now
- How to Reset Check Engine Light After Repair
- DIY vs. Professional Repair: When to Call a Mechanic
- Conclusion
Last Updated: August 25, 2026
What a Check Engine Light Actually Means
A check engine light signals that your vehicle's onboard diagnostic system has detected a problem with the engine, emissions system, or transmission. This light appears when the vehicle computer identifies a fault code. The real question isn't whether you're in immediate danger, usually you aren't, but what's causing it and whether you can fix it yourself.
Your vehicle continuously monitors dozens of sensors tracking oxygen levels, fuel mixture, spark timing, and catalytic converter function. When any system drifts outside acceptable ranges, the computer logs a diagnostic trouble code and illuminates the light. Understanding what triggered it is the first step toward deciding whether this is a DIY fix or a job for a professional mechanic.
Steady Light vs. Flashing Light
A steady light indicates a problem needing attention but isn't immediately dangerous; you can typically drive to a repair shop safely. A flashing light means the engine is misfiring or active damage is occurring (nhtsa.gov). Stop driving immediately, pull over safely, and call for roadside assistance or a tow truck. Continuing to drive with a flashing light risks serious engine damage.
The flashing light usually points to issues like a faulty ignition coil, severe spark plug problems, or major fuel system malfunction. A steady light gives you breathing room to investigate and plan your next move without urgency.
Common Check Engine Light Codes and What They Signal
Diagnostic trouble codes describe what went wrong. Common codes include P0300 (random misfire), P0171 (fuel system too lean), P0420 (catalytic converter efficiency below threshold), and P0133 (oxygen sensor circuit slow response). A P0442 code signals a small emissions leak, possibly just a loose gas cap. A P0401 points to insufficient exhaust gas recirculation.
These codes identify which system isn't performing as expected but don't pinpoint the exact failed part. A P0134 oxygen sensor code could mean the sensor itself is bad or a vacuum leak is throwing off readings. Hands-on diagnosis becomes necessary to narrow it down.
Step-by-Step: How to Diagnose the Problem
Diagnosing a check engine light requires a systematic approach. Start with the simplest checks before moving to complex troubleshooting.
Begin by checking your fuel cap. A loose or damaged cap allows fuel vapors to escape, triggering emissions codes. Tighten it firmly and see if the light resets after a few drive cycles.
Next, assess your vehicle's performance. Does it run normally, or are you noticing symptoms? Rough idling, hesitation during acceleration, poor fuel economy, or unusual sounds all provide clues. Document these observations because they'll help narrow down which codes are relevant.
Visual Inspection Checklist
Before investing in diagnostic equipment, perform a physical inspection. Check your spark plugs for fouling, wear, or incorrect gaps. Look at your air filter; a clogged filter reduces oxygen and can cause lean-running conditions. Inspect visible hoses and connections for cracks, loose clamps, or disconnected lines. A vacuum leak is one of the most common causes and can often be spotted visually.
Examine your battery terminals and cables for corrosion or looseness. Check for obvious fluid leaks under the engine. Look at your exhaust system for damage or loose components. This inspection takes 15 minutes and costs nothing. Many check engine light issues resolve after tightening a gas cap, replacing an air filter, or reseating a loose connector.
Using an OBD2 Scanner for Beginners
An OBD2 scanner reads the diagnostic trouble codes your vehicle's computer has stored. This tool plugs into the diagnostic port, typically located under the steering column on the driver's side.
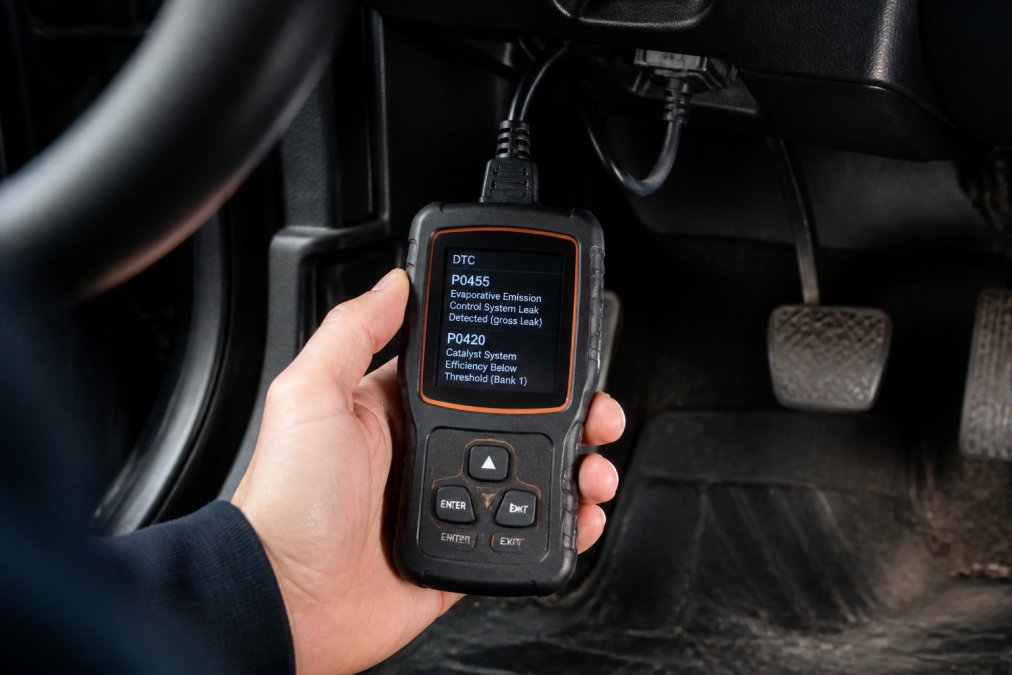
Turn your ignition to the "On" position without starting the engine. Plug the scanner into the diagnostic port, press the appropriate buttons to read codes, and write down everything displayed. Most scanners show the code number, a brief description, and whether the code is pending or confirmed.
Owning a scanner lets you know exactly which system is failing before deciding on next steps. Many auto parts stores offer free code reading if you don't want to buy a scanner.
Quick Fixes You Can Try Right Now
Several common check engine light causes can be resolved with basic tools and minimal expense.
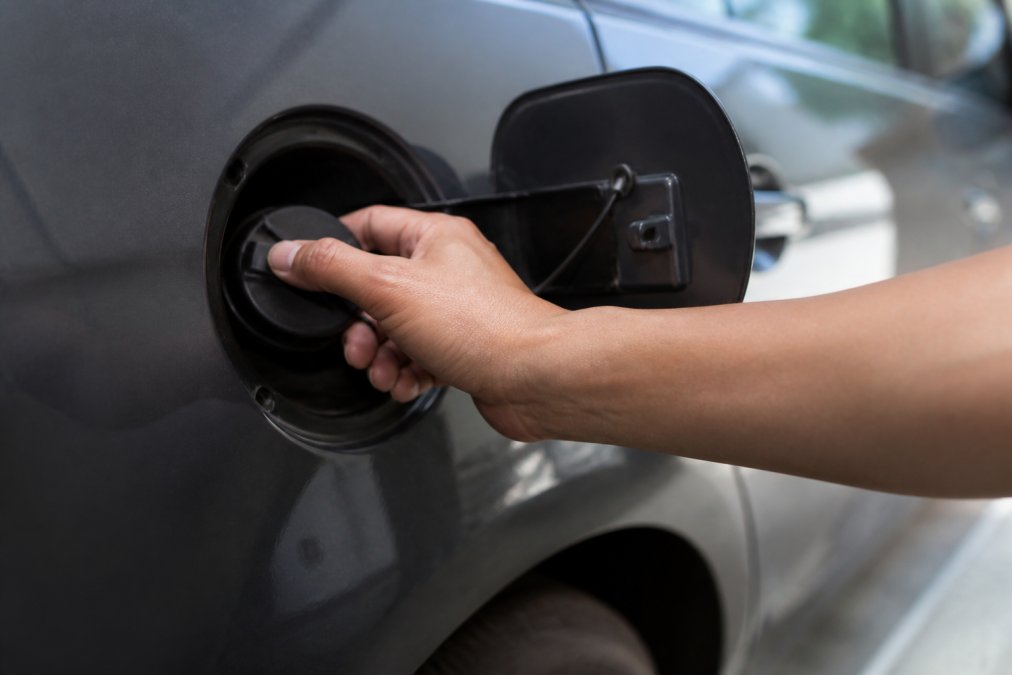
Tighten your gas cap if it's loose or damaged. This fix takes 30 seconds and costs nothing if loose. If cracked, a replacement costs under $15.
Replace your engine air filter if visibly dirty or clogged. A dirty filter restricts oxygen flow, causing the engine to run rich. Changing the filter takes 10 minutes and typically costs $15-$30.
Check all visible hoses and connections for looseness or damage. A disconnected PCV hose or loose sensor connector often resolves the issue immediately.
If spark plug wires or ignition coils look damaged or corroded, replacing them is a moderate DIY task. Spark plugs typically cost $10-$20 each; ignition coils range from $20-$100.
These quick fixes address roughly 40% of check engine light cases. If none resolve your issue, you're looking at more involved diagnostics or professional repair.
How to Reset Check Engine Light After Repair
Once you've completed a repair, you need to clear the fault codes from your vehicle's computer. The light won't turn off automatically just because you fixed the problem.
The simplest method is disconnecting your vehicle's battery for 15 minutes. This clears the computer's memory and resets all stored codes. Reconnect the battery, start the engine, and the light should be gone if your repair was successful.
If you have an OBD2 scanner, use its clear codes function. Simply plug in the scanner, navigate to the clear codes menu, and confirm. The light should extinguish immediately.
After clearing codes, drive your vehicle through a normal drive cycle, highway driving, city driving, and idle time. Your computer needs this to rerun its tests and confirm the repair was successful. If the light comes back on after the drive cycle, your fix didn't address the underlying problem.
DIY vs. Professional Repair: When to Call a Mechanic
The decision between DIY diagnosis and professional repair depends on the fault code, your mechanical skill level, tools required, and safety implications.
DIY-Safe Repairs: Tools and Skills Required
DIY-friendly repairs include replacing spark plugs, air filters, cabin air filters, battery terminals, and loose connectors. These require basic hand tools and minimal mechanical knowledge.
Spark Plug Replacement: Requires a spark plug socket, ratchet, and gap tool. Difficulty ranges from 30 minutes on a four-cylinder to 2+ hours on a V8. Cost: $10-$20 per plug versus $50-$150 in labor per plug at a shop.
Air Filter Replacement: Requires only a screwdriver or no tools. Takes 5-10 minutes. Cost: $15-$30 for the filter versus $40-$80 installed.
Loose Connectors and Hoses: Requires only your hands or a screwdriver. Takes 5-15 minutes. Cost: Free if loose; $10-$50 if a hose needs replacement.
Ignition Coil Replacement: Requires a socket set and 15-45 minutes. Cost: $20-$100 per coil versus $100-$300 in labor at a shop.
Professional-Only Repairs: Why Specialized Work Matters
Catalytic Converter Replacement: Requires a lift and specialized tools. The converter operates at extreme temperatures (the EPA). Improper installation creates fire hazards. Cost: $400-$1,200 with labor comprising 50-70%. Not a DIY job.
Oxygen Sensor Replacement: Some sensors are accessible; others require removing the exhaust manifold. Sensors operate in high-temperature environments. Cost: $150-$400 installed. Professional installation is safer unless easily accessible.
Fuel Injector Service or Replacement: Requires fuel system depressurization (safety-critical), specialized tools, and precision reassembly. Improper work creates fire hazards. Cost: $300-$900. Professional service is strongly recommended.
Transmission Work: Requires specialized diagnostic equipment and extensive technical knowledge. Cost: $1,500-$4,000+. Exclusively professional work.
Mass Airflow Sensor Replacement: Requires careful handling to avoid contamination. Cost: $200-$500 installed. Moderate DIYers can handle this if easily accessible.
Vacuum Leak Diagnosis and Repair: Finding a leak requires a smoke machine or specialized equipment. Once located, repair may be DIY-friendly. Cost: $100-$300 for diagnosis; $50-$200 for repair.
Decision Matrix: Key Questions
Before attempting any repair, ask yourself:
- Is the component easily accessible, or do I need to remove multiple engine components?
- Does the repair involve fuel, electrical, or exhaust systems with safety risks?
- Do I have the specialized tools required?
- Is my vehicle under warranty?
- What's the cost difference between DIY and professional labor?
- Do I have mechanical experience with similar repairs?
State Emissions Testing and Drive Cycles
After clearing a check engine light, your vehicle's computer must complete a full drive cycle before it's ready for state emissions testing. A drive cycle includes highway driving, city driving, and idle time, typically taking 100-200 miles over several days.
If you reset the light and immediately test your vehicle, the test may fail because the computer hasn't finished its self-diagnostic sequence. Many states require "readiness monitors" to show as "ready" rather than "not ready."
After repair, drive your vehicle normally for at least one week before scheduling emissions testing. If the light stays off, your repair was successful. If it returns, you'll need to re-diagnose.
Warranty Considerations
If your vehicle is under manufacturer warranty, check coverage terms before attempting repairs. Federal emissions warranties extend to 8 years or 80,000 miles on emissions-related components, which often includes oxygen sensors, catalytic converters, and fuel system parts (the FDA). The dealer may cover repair at no cost under this extended warranty, even if your basic warranty has expired.
Performing unauthorized repairs can void warranty coverage on that component. If unsure whether your repair falls under warranty, contact your dealer before proceeding with DIY work.
Frequently Asked Questions
Q: Can you fix a check engine light yourself?
A: Many check engine light issues can be diagnosed and fixed at home, especially simple problems like a loose gas cap, dirty air filter, or faulty oxygen sensor. However, more complex issues involving the catalytic converter, ignition coils, or emissions system typically require professional service. An OBD-II scanner helps you identify which category your problem falls into before deciding whether to DIY or visit a mechanic.
Q: What are the most common causes of a check engine light?
A: The most frequent culprits are a loose or damaged gas cap, faulty oxygen sensor, bad spark plugs or ignition coils, vacuum leak, dirty mass airflow sensor, and catalytic converter issues. A flashing light usually indicates engine misfire or a serious powertrain problem, while a steady light typically signals a less urgent emissions or sensor fault. Diagnostic trouble codes from an OBD-II scanner pinpoint the exact cause.
Q: How do I reset the check engine light after a repair?
A: After fixing the underlying issue, you can reset the light by disconnecting the vehicle's battery for 15 minutes, using an OBD-II scanner's clear code function, or driving through a complete drive cycle (highway and city driving) so the vehicle computer can verify the repair. The light will return if the problem isn't truly resolved.
Q: How much does it cost to fix a check engine light?
A: Repair costs vary widely depending on the cause. Simple fixes like replacing a gas cap or spark plugs cost $20-$200. Sensor replacements (oxygen, mass airflow) typically run $150-$500. Major repairs like catalytic converter replacement can exceed $1,000. An OBD-II scanner lets you identify the problem before paying for professional diagnostics, which often cost $75-$150.
This article was written using GrandRanker